Managing Users
The Boxlight Admin portal can be used to manage users centrally. Users can be assigned to schools, rooms, licences, and devices according to your organization’s needs.
NOTE: If you are using a supported LMS connection, your Users will be automatically synchronized with your LMS. If this is the case, you should continue to make changes to your Users in your LMS directly and they will sync within 24 hours.
Adding a User
Manual Process
To add Users manually, select the Users tab at the top of the Admin Portal, then click “Add”. There will always be at least one user account belonging to the person who initially set up the Admin Portal instance for the organization.

You will now be prompted to enter the information for the User. First Name, Last Name, Email, and Role are necessary fields.
Optionally you can assign the User to a school, room, assign additional tags (useful for licences or device assignment later), or licences directly.
The user added must have the same email domain ending matching one of your verified domains, or they cannot be added.

Automated CSV Import
To add Users via CSV Import, select the Users tab at the top of the Admin Portal, then click “Import”. There will always be at least one user account belonging to the person who initially set up the Admin Portal instance for the organization.
You will now see an “Import Teachers from .CSV file” popup window as shown below.
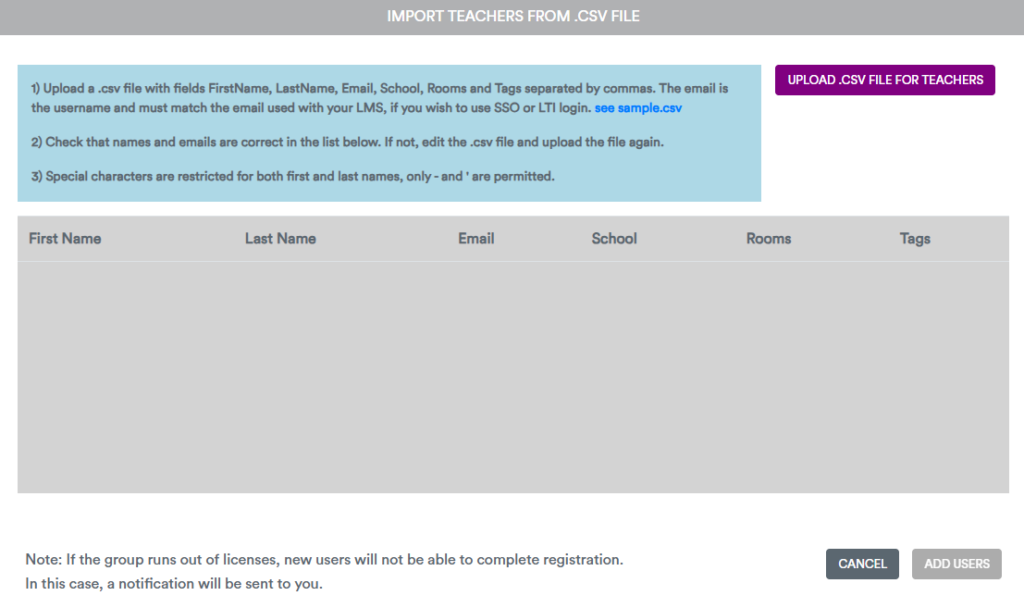
Download the sample.csv file as a template. Below is an example which is ready for import.

FORMATTING NOTE: Please ensure there are no white spaces after content in each cell. If this is the case then the import will fail (the rows affected will be listed).
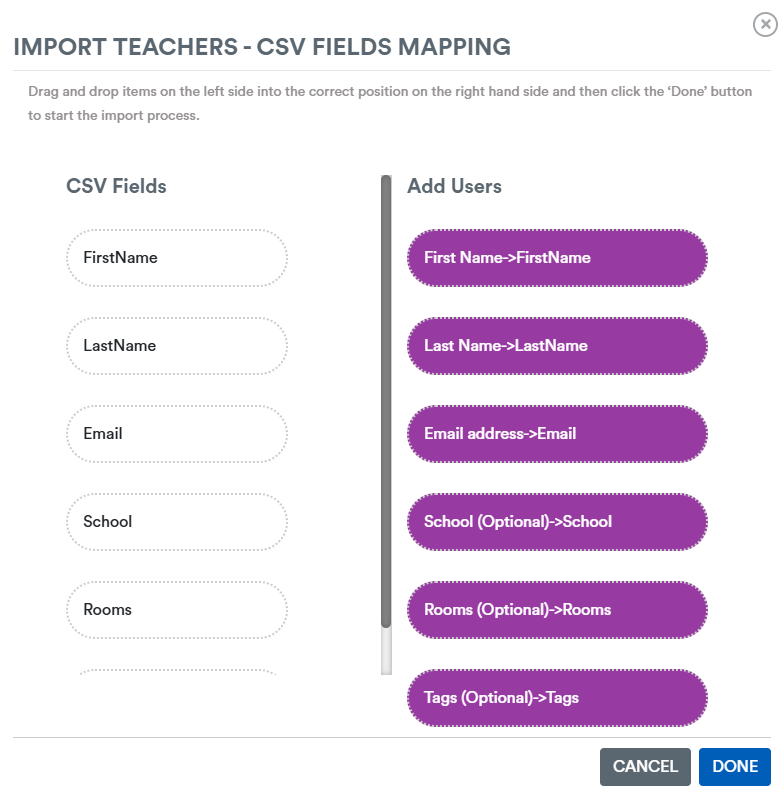
After choosing the CSV to import, you will see the following screen. If you have used the sample.csv, then it will be completed for you in PURPLE. If you are using customized headings you will need to drag and drop items from he left hand side to the appropriate Boxlight Admin Portal format on the right. Unused fields or fields which are yet to be mapped will be WHITE on the right hand side.
Below: Mapping has been completed.
After import, the following screen will appear where you can check the import occurred succesfully.

Now click “Add Users” and they will be populated in the Users area.